
When one puts photos on Facebook, one does risk the eventuality of your photos being stolen. So how do you protect yourself? There are ways to do this. However it will not stop the persistent thief. What you are going to try to do is make your image the least appetizing for thieves to steal and make them go elsewhere for images. Because the last thing you want are images of you and your spouse or your vacation or happy moments going out to the world to see. The only people who should be able to see your images are those whom you've allowed to glimpse into your life.
So here goes. Firstly check your photo albums on Facebook. See that they are all placed to friends. Instruct friends that they are not to "share" or "tag" your images. Tagging your images enables FB or some third party to grab the image from the "tag" or "shared" source.
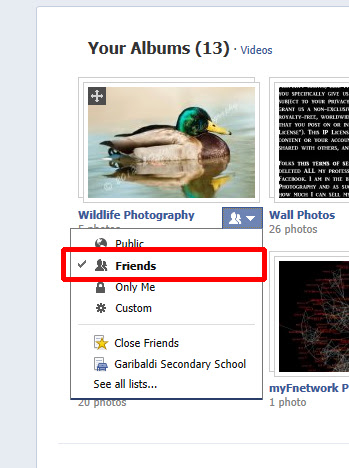
This is how you set your albums on "friends" only status. - keep in mind that you will have to do this to each album individually.
Next for other photos, you will want to make your photos as unappetizing as possible to the photo-thief. And the best way to do this is by placing a glaring watermark right in front of the photo. The best way to do this is by using MS Word to create the watermark, and then CTRL-V'ing it to Adobe Photoshop Elements (And I would recommend that everyone have a copy of Photoshop Elements. It's only $149.99 and it's well worth your money spent to have security and peace of mind
This is how I create my watermarks (after I create one to my liking in Word)
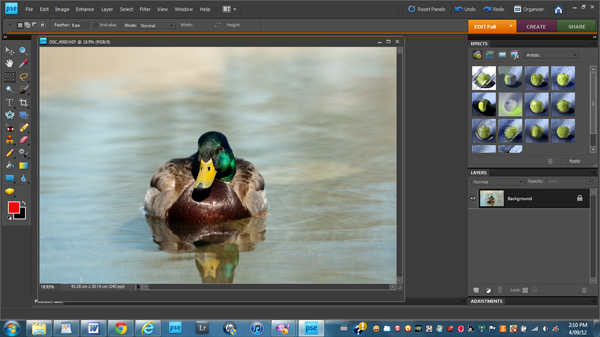
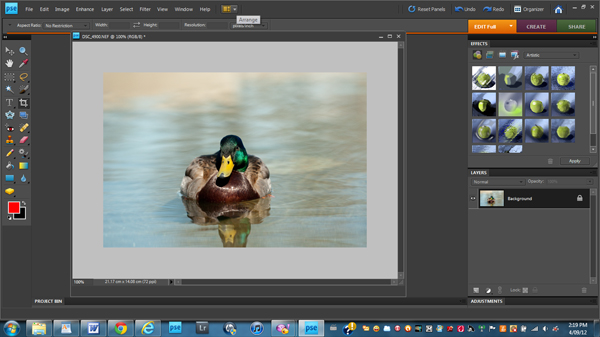
Here is the full size image that I'm going to use for my example photo. Now it's a photo that I'm not putting up on the market, but I would follow the same procedure even if it was.
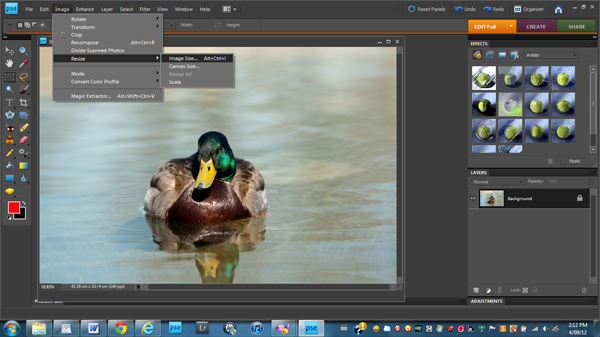
First of all, you are going to resize the image so that it cannot be used by anyone else. This involves making the image so small in datafile size that nobody can reconstruct the image or resize it to useable sizes without making the photo so blotchy and pixellated that it can't be used for anything other than web-display. So first go to Image > Resize.
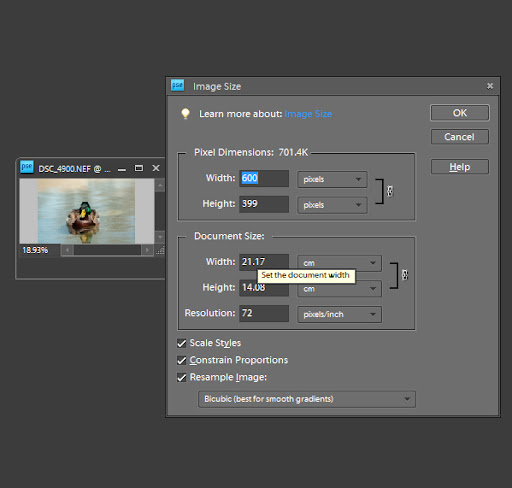
Then you will come to a window like this:
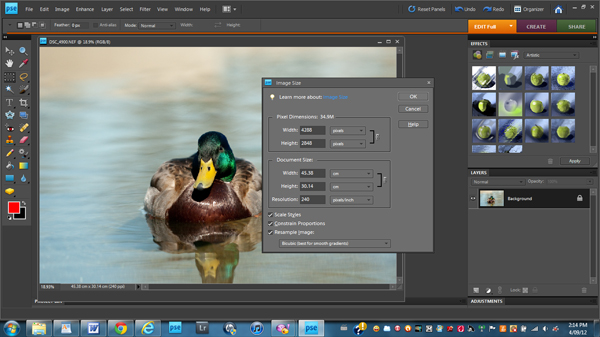
First you will set your dpi at "72" down from "240". This removes dots per inch (which make up the image) to an unuseable amount for resizing back up the image. Secondly you will go and make your image width - for a horizontal orientation photo (normally known as landscape format) to 600 pixels. For a vertical orientation photo (normally known as portrait format) the height would be set at 600 pixels. Do the resizing "IN THIS ORDER" or it will confuse you when you enter in the numbers as the numbers on the width and height will keep changing.

Resize your image back up to 100% via the magnifying glass because your image will have grown instantaneously smaller in the window and you will need your image at 100% magnification to do the next few steps.
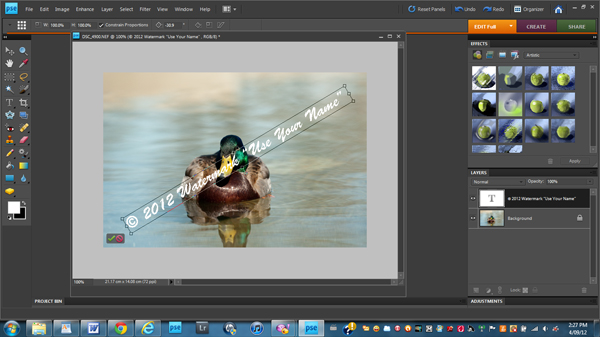
In order to watermark your image, you will have to use the text tool which is that big "T" button to the left side of the window. Click on it and place your text near the center left side of the image. Then use the copyright symbol(you can find it in MS Word under "Insert Symbol"), the year and your name in white (which is usually the best color for visibility in a photo). When you're done you will end up with something like this.

Then use the mouse to go to one of the corners whereupon you will see a curved arrow appear beside your box surrounding your text. This allows you to swivel the text to any diagonal orientation. Note how I've swiveled the text in this next image.
Use the blend menu to use "soft light" to blend the text in with the background (which is your image)
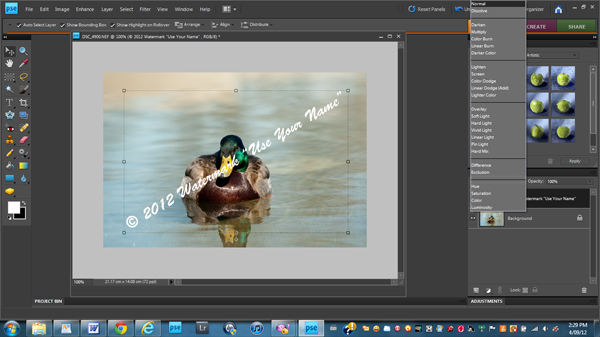
Then use the opacity slider (as shown) to reduce the opacity of your text to 44%. That will make the text of your copyright marking visible but not obstrusive and blocking out parts of the photo you want your friends to see.

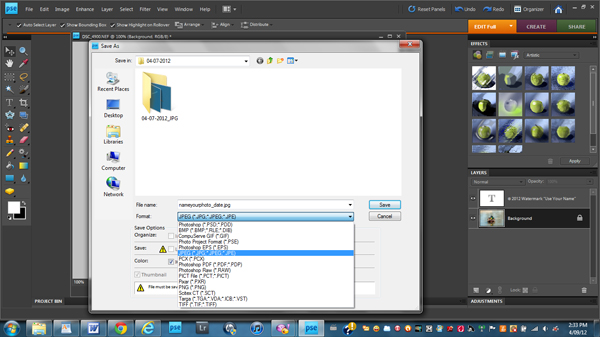
From there, you will go into the File > Save mode where you will end up with this window. What you want to do here is name your file - ideally a combination name of date_name of the photo.
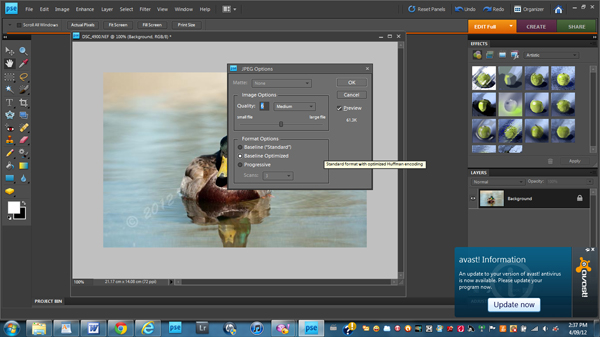
From there, you save the image and it will give you a slider bar indicating the quality of photo that you want to save. Here you want to drop it down to 6 (medium quality) in order to upload your image to Facebook.
This procedure will make it so that no-one will be able to "nick" your photos and get anything useable out of them.
Would the same work if u had a logo?
ReplyDeleteIt should work with a logo as well. The logo will be treated like an "object" and you will be able to change the opacity of the object as you would text.
ReplyDelete